There’s nothing more frustrating than being in the middle of an intense gaming session only for your computer monitor to suddenly go black. This common issue can break immersion, lead to lost progress, and leave you wondering what went wrong. While the problem can stem from various sources within your gaming setup, a systematic approach to troubleshooting can help you identify and resolve it, getting you back into the game quickly.
Common Reasons Your Computer Monitor Shuts Down While Gaming
When your monitor frequently turns off during games, several factors could be at play. Understanding these potential culprits is the first step toward finding a solution.
Overheating Components
Intense gaming pushes your system’s hardware, especially the Graphics Processing Unit (GPU) and Central Processing Unit (CPU), to their limits. This increased workload generates significant heat. If your cooling system isn’t adequate or has dust buildup, these components can overheat, causing them to throttle performance or even temporarily shut down to prevent damage, leading to your monitor losing signal.
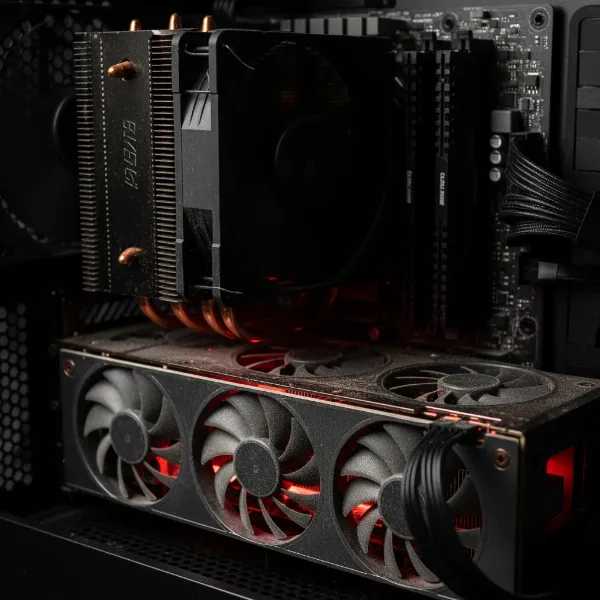 Overheating GPU and CPU inside a dusty gaming PC, with visible heat warnings and dust accumulation.
Insufficient or Unstable Power Supply (PSU)
Your Power Supply Unit is the heart of your PC, delivering electricity to all components. During demanding games, the GPU draws a substantial amount of power. If your PSU is old, underpowered for your components, or faulty, it might struggle to deliver stable power under heavy load. This instability can cause your graphics card to momentarily lose power, resulting in the monitor shutting off.
Outdated or Corrupted Graphics Drivers
Graphics drivers are the essential software that allows your operating system and games to communicate with your graphics card. Outdated, corrupted, or incompatible drivers can lead to a host of display issues, including black screens or your monitor intermittently turning off during gaming sessions. Manufacturers frequently release new drivers to optimize performance and fix bugs, so keeping them current is crucial.
Faulty or Loose Cables
The physical connection between your graphics card and monitor is paramount. A loose HDMI or DisplayPort cable, or one that is damaged or of poor quality, can interrupt the video signal, especially when components shift slightly due to heat or movement. Similarly, a loose power cable to your monitor or PC can cause intermittent power loss.
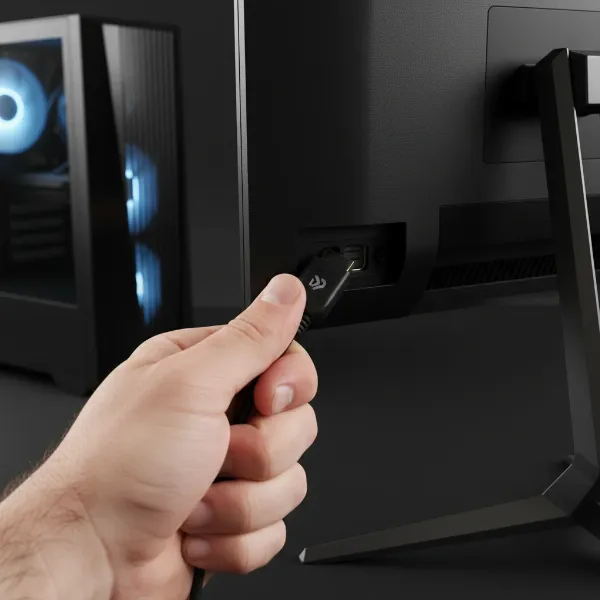 Hand securing loose HDMI or DisplayPort cables connecting a gaming monitor to a PC.
Monitor-Specific Issues
Sometimes, the issue lies directly with the monitor itself. This could include a faulty port on the monitor, an internal component issue, or even game settings that exceed the monitor’s refresh rate capabilities, causing it to lose signal or enter a power-saving mode.
Software Conflicts or Operating System Settings
Less commonly, background applications, certain Windows power-saving features, or fullscreen optimization settings can interfere with game performance and display stability. These software conflicts might cause your monitor to turn off as the system tries to manage resources or recover from a perceived error.
Essential Checks and Basic Fixes
Before diving into more complex solutions, start with these fundamental checks. They are quick, easy, and often resolve the problem.
Verify All Cable Connections
Begin by ensuring all cables are securely plugged in. Check the power cable for your monitor and PC, as well as the HDMI or DisplayPort cable connecting your graphics card to your monitor. A slight wiggle might be all it takes to restore a stable connection. Make sure there’s no undue tension on the cables that could pull them slightly out of their ports.
Test with Different Cables
If your connections seem secure, the cable itself might be the problem. Try swapping out your current display cable (HDMI or DisplayPort) with a known working alternative. You might be surprised how often a faulty or low-quality cable is the culprit behind display interruptions during gaming.
Restart Your Computer
A simple restart can often clear minor software glitches or temporary system errors that might be causing your monitor to turn off. This action refreshes your operating system and can resolve underlying issues without requiring deeper investigation. Always save your work before restarting.
Addressing Overheating Issues
Overheating is a prime suspect when your monitor only turns off during graphically intensive games.
Monitor Component Temperatures
Use monitoring software like MSI Afterburner, HWMonitor, or HWInfo to keep an eye on your CPU and GPU temperatures while gaming. If temperatures consistently climb above 85°C (185°F) for your GPU or CPU, overheating is a strong possibility.
Improve Airflow and Cooling
To combat overheating, ensure your PC has adequate airflow.
- Clean Dust: Regularly clean dust from your CPU cooler, GPU fans, and case fans. Dust acts as an insulator, trapping heat.
- Optimize Fan Curves: Adjust fan speeds for your GPU and case fans through software to ramp up cooling during gaming.
- Case Ventilation: Ensure your PC case has good intake and exhaust fan configurations. Consider adding more fans if your current setup is limited.
- Thermal Paste: If components are several years old, consider reapplying fresh thermal paste to your CPU and GPU.
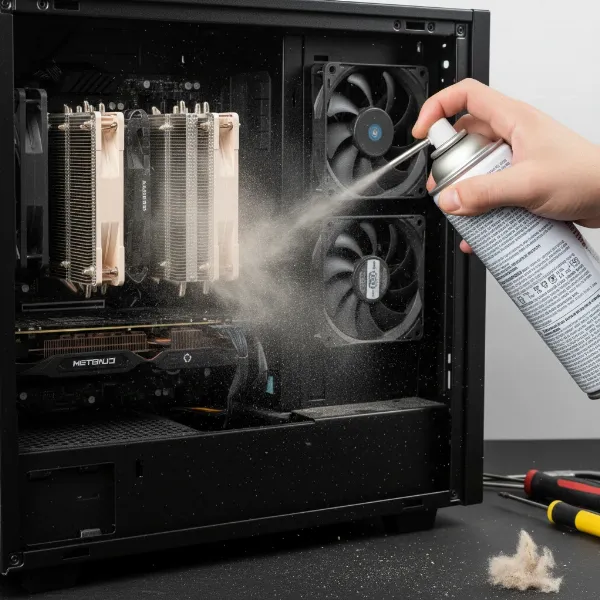 Cleaning dust from PC CPU cooler and case fans with compressed air for better airflow.
“Efficient cooling is non-negotiable for stable gaming performance. Overheating components are a leading cause of system instability, including monitor shutdowns.” – Dr. Elena Petrova, PC Hardware Specialist
Revert Overclocks and Underclocking
If you’ve overclocked your GPU or CPU, revert them to their stock clock speeds. Overclocking increases heat and power draw, which can exacerbate instability. Conversely, underclocking your GPU slightly can reduce both heat and power consumption, potentially preventing shutdowns without a significant drop in gaming performance.
Optimizing Your Power Supply Unit
A stable power supply is critical for uninterrupted gaming.
Assess PSU Wattage and Stability
Check if your Power Supply Unit has enough wattage to meet the demands of your system, especially your graphics card. Online PSU calculators can help estimate your system’s power requirements. An insufficient PSU might operate fine during light use but fail under the heavy load of gaming. Many users find a 600-650W PSU to be borderline for modern gaming systems, depending on component power draw.
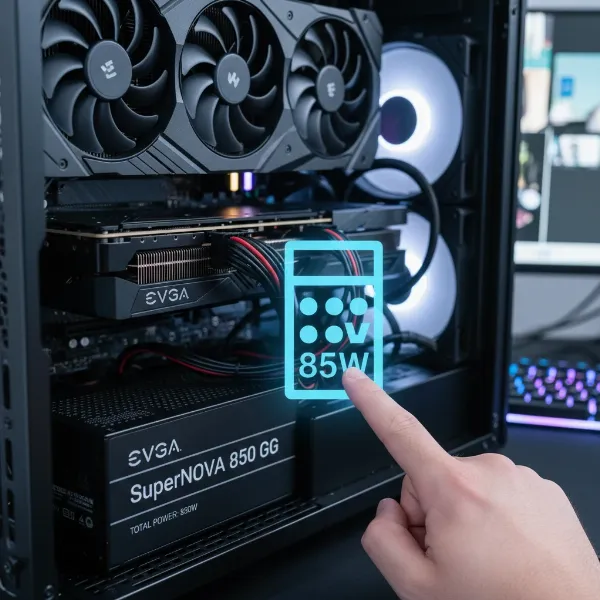 Person examining the wattage label of a Power Supply Unit inside an open PC case.
Check PSU Cable Connections
Ensure that all power cables, particularly the PCIe power connectors running from your PSU to your graphics card, are firmly seated and latched. Loose connections here can cause intermittent power delivery to your GPU.
Consider a PSU Upgrade
If your PSU is old, consistently running at its maximum capacity, or shows signs of failure (like odd noises or complete system shutdowns), upgrading to a higher-capacity, reputable brand PSU might be the most effective solution. A more robust PSU can sustain the power requirements of your components, even during peak usage.
Resolving Graphics Driver Problems
Graphics drivers are a frequent source of display issues.
Update Graphics Drivers
Always ensure your graphics drivers are up to date. Visit the official website of your graphics card manufacturer (NVIDIA, AMD, or Intel), navigate to their support or drivers section, and download the latest drivers compatible with your specific GPU model and operating system.
Perform a Clean Driver Installation with DDU
Sometimes, a standard driver update isn’t enough, as remnants of old drivers can cause conflicts. Using a tool like Display Driver Uninstaller (DDU) allows for a complete removal of previous driver files, enabling a “clean” installation of new drivers. This process can resolve deep-seated driver-related issues.
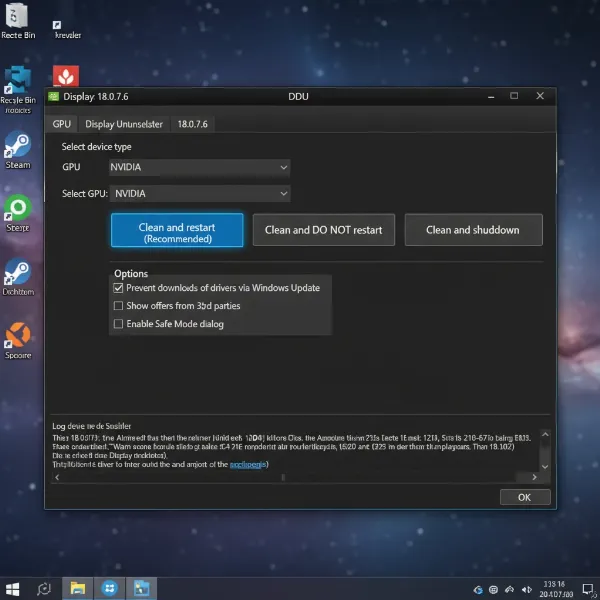 Screenshot of DDU interface, displaying options for a clean graphics driver installation.
Roll Back Drivers
If the problem started after a recent driver update, consider rolling back to a previous, stable driver version that worked correctly. Newer drivers aren’t always perfect and can sometimes introduce new bugs.
Advanced Troubleshooting Steps
If the simpler fixes haven’t resolved the issue, it’s time to explore more advanced solutions.
Adjust Monitor Settings
- Refresh Rate: If you’ve manually set your monitor’s refresh rate to a very high value, try lowering it slightly. Sometimes, specific refresh rates can cause instability with certain games or hardware configurations.
- In-Game Graphics: Lowering in-game graphics settings (e.g., resolution, texture quality, anti-aliasing) reduces the load on your GPU and can prevent it from hitting thermal or power limits that trigger a shutdown.
- Disable Adaptive Sync: Temporarily disable features like NVIDIA G-Sync or AMD FreeSync in your graphics card control panel or monitor settings to see if they are contributing to the issue.
Tweak Windows Power and Display Settings
- PCIe Link State Power Management: In Windows Power Options, go to “Change advanced power settings,” expand “PCI Express,” and set “Link State Power Management” to “Off.” This prevents the PCIe slot from entering a low-power state which can sometimes cause display interruptions.
- Fullscreen Optimizations: Right-click on your game’s executable, go to “Properties,” then “Compatibility,” and check “Disable fullscreen optimizations.” Some games run more stably in borderless windowed mode.
- Windows Updates: Ensure your operating system is fully updated. Windows updates often include critical bug fixes and hardware compatibility improvements.
Inspect and Reseat Internal Hardware
With your PC powered off and unplugged, carefully open your case:
- Reseat GPU: Gently remove and then firmly reinsert your graphics card into its PCIe slot on the motherboard. Ensure it clicks into place and any retaining clips are secured.
- Check RAM: Similarly, reseat your RAM modules. Make sure they are fully seated in their DIMM slots.
- Physical Damage: Visually inspect your motherboard, GPU, and other components for any obvious signs of damage, such as bent pins, burn marks, or bulging capacitors.
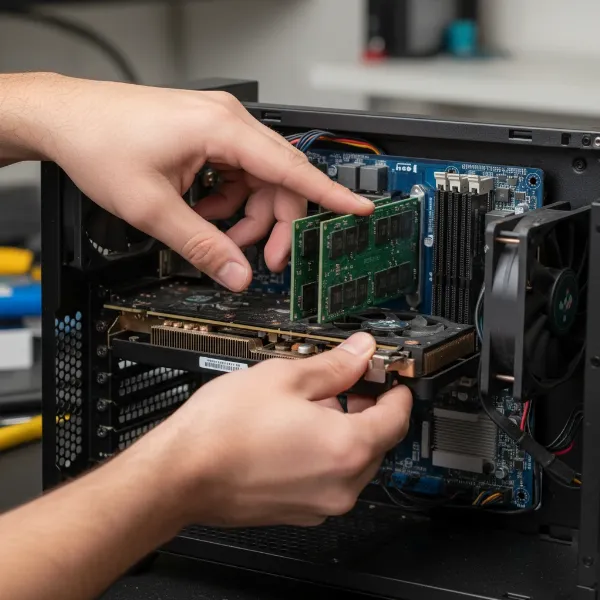 Hands reseating a GPU into PCIe slot and checking RAM modules inside an open PC.
Test for Electrical Interference
In rare cases, external electrical interference can disrupt your display signal. If you notice your monitor turning off when other appliances (like a refrigerator or microwave) turn on, try plugging your PC and monitor into different wall outlets or a surge protector with line conditioning. Using a high-quality, shielded display cable can also help mitigate this.
Run Stress Tests
If you suspect a failing component but aren’t sure which one, dedicated stress test software for your CPU (e.g., Prime95), GPU (e.g., FurMark, Unigine Heaven), and RAM (e.g., MemTest86) can help identify instability or failure under load. Run these tests individually to pinpoint the problematic hardware.
Table: Common Causes & Quick Solutions
| Problem Area | Potential Causes | Quick Solutions |
|---|---|---|
| Power | Insufficient PSU wattage, loose PSU cables, faulty PSU | Check PSU wattage for components, secure all PSU connections, consider PSU upgrade |
| Graphics | Outdated/corrupted drivers, GPU overheating, unstable overclock | Update/clean install drivers (DDU), improve case/GPU cooling, revert overclocks |
| Cables | Loose display/power cables, damaged cable, low quality cable | Ensure cables are secure, replace with a new, quality, shielded cable |
| Monitor | Exceeded refresh rate, faulty monitor port, internal issue | Adjust refresh rate in display settings, test different monitor input ports, try a different monitor |
| System | CPU overheating, software conflicts, OS power settings | Improve CPU cooling, perform a clean boot, adjust Windows power options for PCIe |
When to Seek Professional Help
If you’ve systematically worked through all these troubleshooting steps and your computer monitor continues to turn off during games, it might be time to seek professional assistance. Persistent issues often indicate a more serious hardware failure within your GPU, PSU, motherboard, or the monitor itself, which may require specialized diagnostic tools or replacement parts. Don’t hesitate to reach out to a reputable PC repair service or the manufacturer’s support.
Conclusion
A Computer Monitor turning off during games can be incredibly frustrating, but it’s a solvable problem with a methodical approach. By carefully checking your power connections, managing component temperatures, ensuring your graphics drivers are up-to-date, and ruling out cable or software issues, you can diagnose and fix most common causes. Patience and systematic testing are your best allies in restoring stable and immersive gaming experiences. What specific steps will you take first to troubleshoot your gaming monitor?
Frequently Asked Questions
Why does my monitor only turn off during games and not normal use?
The primary reason your monitor might only turn off during games is the increased demand placed on your system’s hardware, especially the GPU and PSU. Gaming pushes these components to generate more heat and draw more power, revealing underlying instabilities or inadequacies that aren’t apparent during lighter tasks like browsing or watching videos.
How can I check if my PSU is failing?
Testing a PSU requires specific tools like a PSU tester. However, common symptoms of a failing PSU include random system shutdowns (not just the monitor), freezing, unusual noises, or the PC failing to boot altogether. If your monitor turns off but the PC itself remains running, it’s less likely to be a complete PSU failure, but rather an inability to supply stable power to a specific component like the GPU under load.
Is it safe to underclock my GPU?
Yes, underclocking your GPU is generally safe and can be a viable troubleshooting step. It reduces the GPU’s operating frequency, leading to lower power consumption and heat output. Unlike overclocking, which can potentially destabilize your system if done improperly, underclocking carries minimal risk and can improve stability for problematic cards.
What is DDU and why should I use it?
DDU stands for Display Driver Uninstaller. It’s a third-party utility designed to thoroughly remove all traces of graphics card drivers (NVIDIA, AMD, Intel) from your system. You should use DDU for a clean driver installation when you encounter persistent graphics-related issues, are upgrading your graphics card, or suspect driver corruption. This ensures no conflicting files from previous installations interfere with new drivers.