Waking up to or noticing persistent vertical lines scarring your computer monitor can be incredibly frustrating. These unwelcome stripes can disrupt everything from your daily work to your immersive gaming sessions, often leaving you wondering what went wrong with your beloved display. Before you panic and consider a costly replacement for your computer monitor, understand that many instances of vertical lines are fixable with a systematic approach. This guide will walk you through diagnosing the root cause, whether it’s a minor software glitch or a more significant hardware issue, and provide actionable steps to restore your screen to its pristine condition.
Understanding Vertical Lines on Your Computer Monitor
Vertical lines on a computer monitor are a common, yet unsettling, visual anomaly that can appear in various colors, widths, and patterns. Identifying the potential cause is the first critical step toward a solution. These lines are not merely cosmetic; they indicate a disruption in how your monitor receives or processes visual data.
What Causes Vertical Lines?
The origins of vertical lines are diverse, stemming from both internal and external factors affecting your display ecosystem. Pinpointing the exact cause requires careful investigation, as symptoms can often overlap between different issues.
- Hardware Issues: The most common culprits include loose or damaged cables connecting your computer to the monitor, issues with the monitor’s internal display panel itself (such as a malfunctioning pixel matrix or internal circuitry damage), problems with your computer’s graphics card (GPU), or even issues with the system’s RAM (Random Access Memory). Physical impact or moisture exposure can also cause internal hardware damage.
- Software Issues: Often, the problem lies within your system’s software. This could involve outdated, corrupted, or incompatible graphics drivers that fail to communicate effectively with your monitor. Incorrect display settings, such as an unsupported resolution or refresh rate, can also lead to display artifacts. Operating system glitches or conflicts can also manifest as visual distortions.
- External Factors: Sometimes, the environment plays a role. Overheating of your graphics card or other internal components can cause graphical anomalies. Power supply inconsistencies or interference can also contribute to unstable display signals.
|
Our Picks for the Best Computer Monitor in 2026
As an Amazon Associate I earn from qualifying purchases.
|
||
| Num | Product | Action |
|---|---|---|
| 1 | New! Sceptre 27-inch Gaming Monitor 100Hz 1ms DisplayPort HDMI x2 100% sRGB AMD FreeSync Build-in Speakers, Eye Care Frameless Machine Black 2025 (E275W-FW100T Series) |

|
| 2 | Amazon Basics 24 Inch (23.8 inch viewable) Monitor, FHD 1080P, Max 100Hz, VESA Compatible, Built-in Speakers, Black |
|
| 3 | KOORUI 22 Inch Computer Monitor Full HD 1080P 100Hz PC Gaming Screen VA Panel Ultra-Slim Display 3000:1 Contrast Ratio with Adpitive Sync (HDMI/VGA/VESA Compatible 100x100mm/Audio Out), Tilt, Black |
|
| 4 | Philips 221V8LB 22 inch Class Thin Full HD (1920 x 1080) Monitor, 100Hz Refresh Rate, VESA, HDMI x1, VGA x1, LowBlue Mode, Adaptive Sync, 4 Year Advance Replacement Warranty |
|
| 5 | LG 24U411A-B 24-inch Full HD (1920 x 1080) IPS Computer Monitor, 120Hz, HDR10, Reader Mode, Flicker Safe, HDMI, Slim Stand Base, Black |
|
| 6 | KOORUI 24-inch Computer Monitor Full HD 1920 x 1080p 100Hz VA Display 4000:1 Contrast Ratio with HDMI VGA, TÜV Rheinland Certified, 100 x 100 mm VESA Mountable, Ultra-Slim Design, Tilt, Black, E2412F |
|
| 7 | MNN Portable Monitor 15.6inch FHD 1080P USB C HDMI Gaming Ultra-Slim IPS Display w/Smart Cover & Speakers,HDR Plug&Play, External Monitor for Laptop PC Phone Mac (15.6\'\' 1080P) |
|
| 8 | Samsung 32-Inch Flat Computer Monitor, 75Hz, Borderless Display, AMD FreeSync, Game Mode, Advanced Eye Care, HDMI and DisplayPort, LS32B304NWNXGO, 2024 |
|
| 9 | Samsung 27\" Essential S3 (S36GD) Series FHD 1800R Curved Computer Monitor, 100Hz, Game Mode, Advanced Eye Comfort, HDMI and D-sub Ports, LS27D366GANXZA, 2024 |
|
| 10 | acer 27 Inch Monitor- KB272-27 Inch FHD IPS (1920 x 1080) Display, Up to 120Hz Refresh Rate, 99% sRGB, Tilt, Adaptive-Sync Support (FreeSync Compatible) 1ms (VRB), HDMI & VGA Ports |
|
Initial Troubleshooting Steps for Vertical Lines
Before diving into complex diagnostics, start with these simple yet effective solutions. Many vertical line issues on a computer monitor can be resolved quickly by addressing basic connections and system states.
The Quick Fixes
When faced with vertical lines, these initial steps are your first line of defense, often rectifying temporary glitches.
- Restart Your Computer: A simple reboot can often resolve temporary software conflicts or system errors that might be causing the lines. This clears the system’s memory and reinitializes hardware connections, sometimes eliminating the problem.
- Power Cycle Your Monitor: Turn off your monitor, unplug its power cable from the wall or power strip, wait for about 30-60 seconds, then plug it back in and turn it on. This can reset the monitor’s internal electronics and clear any residual power that might be causing issues.
- Reseat Video Cables: Disconnect the video cable (HDMI, DisplayPort, DVI, VGA) from both your computer monitor and your computer’s graphics card. Inspect both ends for any bent pins or damage. Firmly reconnect them, ensuring they are snug and secure. A loose connection is a very common cause of signal disruption and vertical lines.
- Try a Different Video Cable and Port: If reseating doesn’t work, try using a completely different video cable. If you have multiple ports on your graphics card (e.g., two HDMI ports or a DisplayPort and an HDMI), try switching to an alternative port on both your computer and your monitor. This helps rule out a faulty cable or a specific port issue.
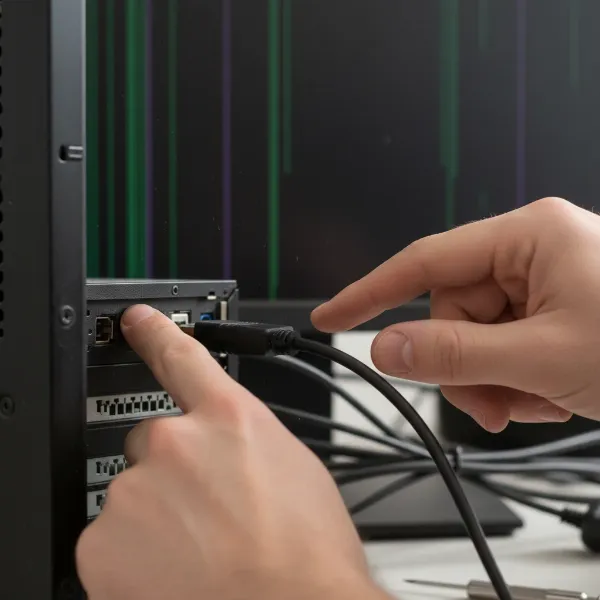 A person checking cables connecting a computer monitor to a PC to troubleshoot vertical lines on screen
Basic Diagnostic Checks
These checks help narrow down whether the issue originates from the computer itself, the connecting cable, or the computer monitor. It’s about isolating the problem to a specific component.
- Test with Another Monitor or PC: Connect your computer monitor to a different computer or laptop. If the vertical lines disappear, the problem lies with your original computer’s graphics card, drivers, or internal components. Conversely, if the lines persist on a different PC, your computer monitor or the cable is likely the issue.
Conversely, if you have another monitor available, connect it to your current PC. If the new monitor displays correctly, your original monitor is the problem. - Check On-Screen Display (OSD): Access your computer monitor’s built-in OSD menu (usually via buttons on the monitor itself). If the vertical lines appear over the OSD menu, it’s a strong indicator that the monitor panel itself is defective. If the OSD menu appears clear and free of lines, the problem likely stems from the signal coming from your computer or the cable.
- Take a Screenshot: Press the “Print Screen” key (or use Windows Key + Shift + S for Snipping Tool) and paste the screenshot into an image editor like Paint or upload it to an online service. If the vertical lines appear in the screenshot, it indicates a software or graphics card issue, as the image data itself is corrupted before being sent to the monitor. If the lines do not appear in the screenshot, it points to a hardware problem with the monitor or the physical cable connection.
Advanced Troubleshooting for Software-Related Issues
If initial checks suggest a software or driver problem, these advanced steps focus on ensuring your system is sending a clean, correct signal to your computer monitor.
Update or Reinstall Graphics Drivers
Outdated or corrupted graphics drivers are a frequent cause of display anomalies, including vertical lines.
- How to Update Drivers (Device Manager):
- Right-click the Start Menu and select Device Manager.
- Expand Display adapters.
- Right-click on your graphics card (e.g., NVIDIA, AMD, Intel) and select Update driver.
- Choose Search automatically for drivers. If new drivers are found, install them and restart your PC.
- How to Clean Install Drivers (DDU Tool Mention): If a simple update doesn’t work, a clean installation is often more effective. This involves completely uninstalling current drivers using a tool like Display Driver Uninstaller (DDU) in Safe Mode, then installing the latest drivers downloaded directly from your graphics card manufacturer’s website. This ensures no corrupted files remain.
- Try Rolling Back Drivers or Using Older Versions: Sometimes, the latest driver might have a bug. In Device Manager, right-click your graphics card, select Properties, go to the Driver tab, and click Roll Back Driver if available. Alternatively, search your manufacturer’s website for slightly older, stable driver versions.
Adjust Display Settings
Incorrect display settings can confuse your computer monitor, leading to visual glitches.
- Check Screen Resolution: Ensure your display resolution is set to the recommended (native) resolution for your computer monitor. You can find this in Display Settings (Right-click desktop > Display settings). Using a non-native resolution can cause scaling issues and sometimes lines.
- Experiment with Refresh Rate: An incompatible or unstable refresh rate can cause display artifacts. In Display Settings > Advanced display settings, try lowering your monitor’s refresh rate (e.g., from 144Hz to 60Hz or 120Hz). Some users have reported vertical lines disappearing when the refresh rate is adjusted.
System-Level Checks
Beyond drivers and display settings, deeper system configurations might need attention.
- Boot into Safe Mode: Restart your computer into Safe Mode. If the vertical lines disappear in Safe Mode, it strongly suggests a software conflict or an application causing the problem, as Safe Mode loads with minimal drivers and programs. You can then systematically disable recently installed software.
- Check for Operating System Updates: Ensure your Windows (or macOS) operating system is fully up to date. Sometimes, OS updates include patches for display issues or driver compatibility.
- Update BIOS/UEFI: An outdated BIOS/UEFI firmware can sometimes cause hardware compatibility issues affecting display output. Visit your motherboard manufacturer’s website for the latest updates and follow their instructions carefully. Be cautious, as a failed BIOS update can render your system unbootable.
Advanced Troubleshooting for Hardware-Related Issues
If software solutions yield no results, the problem likely resides within your system’s physical components. These steps require a bit more comfort with opening your PC case.
Inspect Graphics Card and RAM
The graphics card and system memory are crucial for display output.
- Reseat the Graphics Card: Power down your PC, unplug it, and open the case. Locate your graphics card and carefully unlatch it from its PCIe slot. Remove it, inspect the slot and card’s connectors for dust or damage, then firmly reinsert it until it clicks into place. Ensure any supplementary power cables are also securely connected.
- Check for GPU Overheating: Overheating can cause graphical corruption. Monitor your GPU temperatures using software like MSI Afterburner or HWMonitor. Ensure your PC’s cooling system is working correctly and clean any dust from your GPU fans and case vents. Excessive heat can permanently damage your graphics card.
- Reseat RAM Modules: While less common, faulty or improperly seated RAM can sometimes manifest as display issues. Power down your PC, open the case, and carefully remove your RAM sticks from their slots. Reinsert them firmly until they click, ensuring they are seated correctly. If you have multiple sticks, try testing them one by one.
When Your Monitor is the Culprit
If all other tests point away from your PC, then your computer monitor itself is likely at fault.
- Understanding Internal Panel Defects: If vertical lines appear even when the monitor is disconnected from the PC (e.g., during the monitor’s self-test or on a “No Signal” screen), it indicates an internal panel defect. This could be due to damaged ribbon cables connecting the panel to the control board, a faulty T-Con board, or direct pixel damage.
- Monitor Self-Test/Diagnostic Modes: Many modern computer monitors have a built-in self-test or diagnostic mode that can be activated via its OSD menu. Running this test can confirm if the monitor is internally generating the lines. If the lines appear during this test, the monitor requires repair or replacement.
> “Persistent vertical lines, especially when they appear before any input signal or during a monitor’s self-test, are a strong indicator of an internal panel or control board issue. While some minor panel issues can be temporarily mitigated, typically, these require professional repair or a replacement monitor for a lasting solution.” – Dr. Alex Chen, Lead Display Engineer, TechInsights Labs
When to Seek Professional Help or Consider Replacement
After exhausting all troubleshooting options, it’s essential to know when to call in the experts or when it’s time to invest in a new computer monitor.
Identifying Irreparable Damage
If, after meticulously following all the troubleshooting steps, the vertical lines on your computer monitor persist, it’s likely a sign of more serious, often irreparable, damage. This is particularly true if the lines appear immediately upon powering on the monitor or during its internal diagnostic test, independent of any computer connection. Physical damage to the screen, such as cracks or pressure marks, almost always results in permanent lines.
Weighing Repair vs. Replacement
Deciding between repairing your existing monitor and purchasing a new one comes down to a few key factors:
- Cost Considerations: For internal panel defects, the cost of parts and labor for repair can often approach or even exceed the price of a brand-new, entry-level to mid-range computer monitor. Researching repair costs locally can help you make an informed decision.
- Warranty Information: Check if your computer monitor is still under warranty. If so, contact the manufacturer’s support; they may offer a repair or replacement at no cost.
- Monitor Age and Value: For older, less advanced monitors, replacement is usually the more economical and practical choice, offering you updated technology and a fresh warranty. For high-end, specialized, or recently purchased monitors, repair might be worthwhile.
In many cases, the vertical lines you see on your computer monitor are a solvable problem. By systematically checking cables, updating drivers, and diagnosing hardware, you can often restore your display. If the issue persists, seeking expert advice or considering a new computer monitor might be your best next step. What’s the most unusual display issue you’ve ever encountered?
Frequently Asked Questions
Why are there colorful vertical lines on my monitor?
Colorful vertical lines often indicate a signal integrity issue or a problem with the graphics processing. This can stem from a loose video cable, a faulty graphics card, outdated drivers, or internal damage to the monitor’s display panel or T-Con board. Testing with another monitor or cable can help diagnose the specific culprit.
Do vertical lines mean my monitor is broken?
Not necessarily. While vertical lines can indicate a broken monitor panel, they are just as frequently caused by issues with cables, graphics drivers, or the graphics card. Always perform basic troubleshooting steps first to determine if the problem is hardware-related to the monitor itself or an external factor.
Can a bad HDMI cable cause vertical lines?
Yes, absolutely. A damaged, low-quality, or improperly seated HDMI (or DisplayPort, DVI, VGA) cable is one of the most common reasons for vertical lines or other display artifacts. The cable is responsible for transmitting visual data, and any interruption can lead to distortions. Try swapping it out with a known good cable.
Will updating drivers fix vertical lines?
Updating your graphics drivers often resolves vertical lines if the problem is software-related. Outdated, corrupted, or incompatible drivers can cause your computer to send incorrect signals to the monitor. A clean installation of the latest drivers from your graphics card manufacturer’s website is a crucial troubleshooting step.
How do I know if it’s my graphics card or monitor?
To differentiate, connect your Computer Monitor to a different PC. If the lines disappear, your graphics card is likely the issue. If the lines persist on another PC, your monitor is probably at fault. Also, check if the lines appear over the monitor’s built-in On-Screen Display (OSD); if they do, it’s the monitor.